March 31, 2010

Completely Concerning Copyrights

© Todd Walker

Lately I’ve been increasingly interested in copyrights; what it is, what its for, who’s it for, and why I should care. I run into a lot of my fellow photogs who don’t care about copyright, are willing to give it away for free, or look down on anyone who does care about copyrights. This ought not be the case. If you’re a photographer, especially if you are making a living at it, you need to understand copyrights. We ought to understand our right, and hold that right in high regard.

First of all, a copyright is your right. Anytime you create a photograph, it yours for 75 years after your death. After that, it belongs to the public (at that point, anyone can do anything they please with what you create). This means, if I create an image at age 30, live ‘til I’m 80, then that image is owned by me or my linage for125 years! This gives me a great deal of incentive to keep shooting. Why? Because of all that I invest into an image, once I create it, I own it. My work is protected. Does this mean it will never be stolen? Hardly. But, if they do, I can take legal action, reclaiming any revenue I may be owed.

Copyright not a new concept. According to John Harrington in his book "Best Business Practices for Photgraphers," he points out that "copyrights are included by our founding fathers, spelled out in the US Constitution." To those of you out there who think copyrights aren’t all that important, chew on this: "In Section 8, the Constitution stipulates that congress shall 'promote the Progress of Science and useful arts, by securing for limited Times to Authors and Inventors the exclusive Right to their respective Writings and Discoveries.' This is found within the first 1,600 words of our Constitution that, without amendments, is approx. 4,500 words in length. This exclusive right explanation comes before a discussion of who can be the president and how, before the rules and obligations of the states, and before the Bill of Rights, and all the other amendments such as ending slavery, right to bear arms, and women’s rights." This was the basis for copyright. Not even on the amendments, but on the body of the Constitution itself. It is a big deal, and has been throughout modern history.

Here’s a personal reason I care about copyright laws.

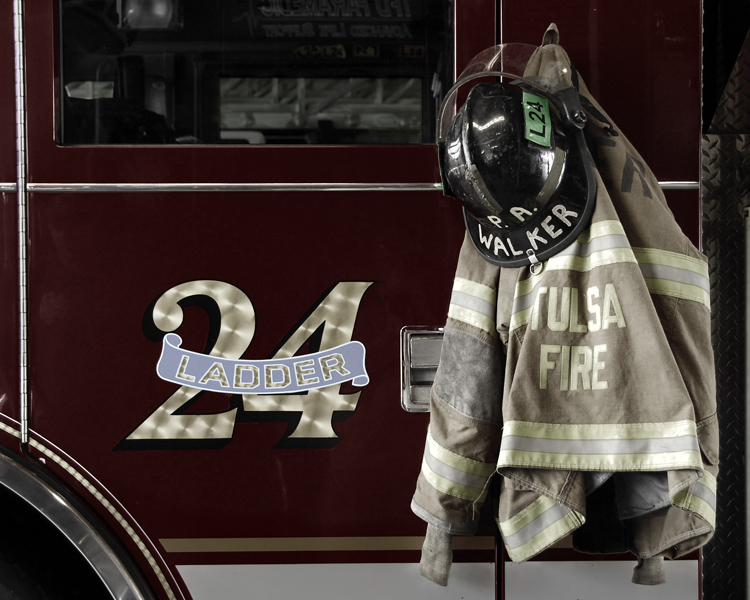
A few years back, my Dad retired from the Tulsa Fire Department. As a gift, I photographed his bunker gear on the ladder truck he drove throughout his career (this is the image at the top of this post). We then matted the photograph with a large matte, framed it, and had firefighters from all over the Tulsa area who’d worked with Dad over the years sign the matte board. The gift was a huge hit. Everyone loved it. I soon began to have firefighters from Dad’s station begin to ask me to create them a similar image of their bunker gear. They insisted they’d pay me for my work. So, one afternoon, I arrived at my Dad’s old station and spent several hours capturing the different images. I then spent a great deal of time creating the final images in PS. After that, I returned to the station and presented 5x7 proofs to each of them, along with a list of prices for prints.

That’s the last I ever heard from them. Now, I have no way of knowing for sure if my images have been illegally reproduced and thus my copyright infringed. But, based on the amount of enthusiasm of my “clients”, and then the utter lack of communication since, I have a sinking feeling there are several 8x10s and 11x14s of my work hanging some walls somewhere. And I have nothing to show for it. I am NOT saying these guys are outright crooks. To the contrary, they truly are Tulsa’s finest, many of whom are my Dad’s lifelong friends. If my copyright has been infringed, it is likely due to ignorance of the law, rather than outright malice.

But either way, I did a lot of work, created several unique images, and received no compensation. I did, however, learn a TON from that endeavor. Like the importance of copyrights, educating clients about copyrights, charging a “creative” fee up front, using a contract, not giving large hard copies for proofs, following up with phone calls/emails afterwards – something, anything but the way I handled things.

So why not take action and get what I’m owed for these images? A couple of reasons. 1) like I said, I'm not even sure they have been reproduced. I’d have to go into these guys’ houses and seen it for myself. Then I’d have to prove it in a court of law. And I’m not willing to do that for reason 2) these men are my Father’s friends. They each are responsible for keeping one another safe (alive) fighting countless dangerous fires over the years. If they did infringe on my copyright, I’m okay with that. They helped my dad make it to retirement free of major injury. If I had it to do over again, due to the unique situation, I would have insisted on doing it for free and given high resolution images on discs. Instead, because of the way I handled it, it created an awkward situation.

For more information on the subject, I would suggest reading “Best Business Practices for Photographers” by John Harrington; “The Law, in Plain English, for Photographers” by Leonard D. Duboff; “Legal Handbook for Photographers: The Rights and Liabilities of Making Images” by Bert P. Kranges; and “Copyright in Historical Perspective” by Lyman Ray Patterson.

So there. A lot of words about copyrights. Your work is protected. You should be compensated for your created work. You have a right to take action for stolen work. You should respect the copyrights of others.

Oh, and don’t even get me started on everyone out there who is pirating (stealing) copies of Photoshop, Lightroom, and the like. These too are protected under Federal Copyright Laws. How, in good conscience, can anyone expect their copyright to be respected when the photographs have been created on stolen (copyright infringed) software? That is a massive double standard at the vary least, and outright criminal if caught. Just as we have the right to take legal action against those who steal our images, so too the software companies have the right to take legal action against those who steal their software. But that’s a whole other post. One which I will likely write in the near future. =)

Now, go out and shoot something!

March 29, 2010

Stacy F's Image Critique

© Stacy Fields

First off, let me start by saying I need more images to critique, and questions to answer. I have a few more in each category, but I’ll be needing more soon. So, if you’re out there reading this, and need/would like to have one or more images critiqued, you can e-mail them to me (high resolution please, I’ll format them for the web) at toddwalkerphotography@gmail.com. I know many of you following this blog have questions. If you’ve noticed, I haven’t been putting names to the questions, so you don’t have to feel stupid, like you’re the only one out there who doesn’t know – even though you aren’t. So e-mail your questions, no matter how “dumb” or insignificant they may be. Okay? Okay. Now on to the image critique.

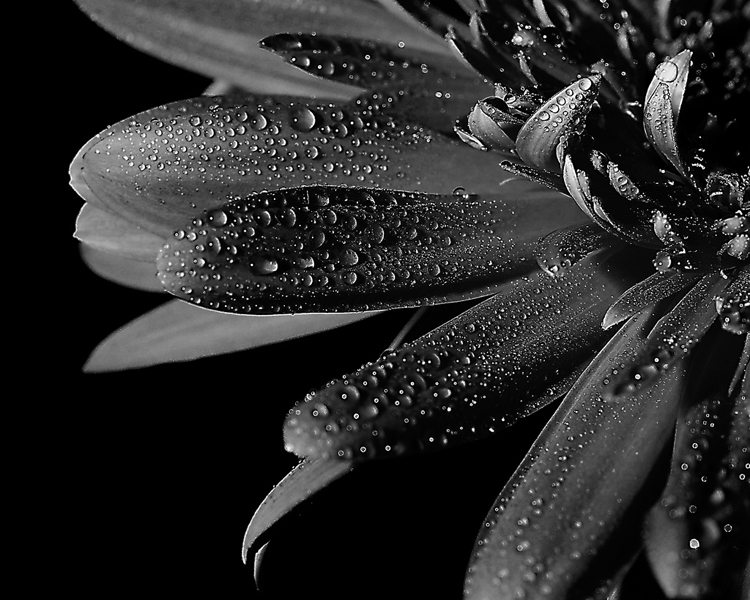
This week’s image comes to us again from Stacy. Its her second to be put up for discussion. The image is a detail shot of a flower with water drops on the petals. Now I’ll be the first to tell you that I’m not a macro/flower/pretty-shapes-made-with-water-drops expert. I'm a portrait photographer. However, I do have an eye for beauty and I know what I like. And I like this shot, and have a few things to say. BUT, on any shot like this, I’ll always defer to you nature photographers out there. If that’s you, please post your thoughts in the comments section below.

First thing I like is the tight composition. This helps to accentuate the drops of water all over the frame. Its busy, but in a good way. It has good contrast which make it a striking image. There’s good specular highlights on the water drops; good texture to the petals; and the black background was a good choice. Though, I’d be interested to see this same shot on a white bg. Scratch that, I just swapped the bg in PS and it’s not nearly as nice white as it is black. So nice choice. Overall a very nicely done image.

Here’s a couple of things I’d like to point out. Not necessarily negatives, but some things to help us think a bit. This type of subject is suitable for selective focusing. Though I think the deep depth of focus works well, you could also use a very shallow depth of focus and highlight say, one petal, or one row or droplets. You can do this of course by opening up your aperture to say f/3.5 or f/2.8 or larger.

Another thing that you could do is limit the amount of water droplets. If you had say even only one large drop, it would draw the eye to one focal point. This would create a completely different image, the drop itself would become the main subject, and the flower merely environmental.

Again, these are merely pointed out for thinking and discussion. The image as is, is great. Keep up the good work Stacy!

Now, go out and shoot something!

March 27, 2010

Your Questions Answered: What's your post production workflow?


One of the most important aspects of our craft is a good post-production workflow. A poor workflow can drive you crazy. If you're trying to make money in photography, you can waist a lot of time with a poor production workflow - and time is money. The more efficient you are with your post production, the more time you'll have to do other important lucrative things - building relationships with clients, making contact with potential clients, working on your skills, creating more images, and the list goes on. Being stuck at your computer keeps you away from some very important stuff.

The thing that has streamlined my post production workflow is to pursue capturing everything I possibly can in the camera. I am passionate about this pursuit. If spend the time on a shoot to capture my vision in camera, then I won't have to spend that time later in post. I've found slowing down to fix problems during a shoot is time well spent; while waiting to fix problems after the shoot at the computer becomes a time waster. Its inevitable. Happens every time.

Here's a quick look at my workflow, start to finish. Shoot the images. Copy the images onto two hard drives for backup. Load the images into Lightroom. Delete the clunkers. Then adjust the keepers. And I use the word "adjust" deliberately. Since I've done what I can to get 'em right in camera, I now only have to do minor adjustments to exposure, color, contrast, etc. I usually spend only a couple of minutes tops on an image. After that, some of the images may still require some photoshoping - remove acne, wrinkles, the person walking in the background I failed to notice etc. After that, I save the final images, and done. I recently watched a video of Zack Arias' workflow and was surprised that his workflow is almost identical to the way I've been doing it for a long time now. He utilizes one more program for loading/organizing his images on his hard drives, but then its into LR, a tad of PS, then done. For a more in-depth look at a similar workflow to mine, check out his video HERE. The nice thing about Zack posting his video is I don't have to do a video on it. Thanks Zack!! =)

Having said all of that, I'm continually looking for ways to be more efficient. So ask me again in 6 months, and its likely to be different.

Now, go out and shoot something!

March 24, 2010

Portraiture 101: Lenses

© Todd Walker

I seem to be coming across photogs out there that are confused about the same thing: which lens to use for portraits. As you all well know, I do not ascribe to this ideas that we need a new piece of equipment to be better photographers. Put simply, the number one thing new gear does for us is drain our bank account. If we would only understand the limitations of our gear, we could then maximize its capability. We must master the equipment we already own. But I digress. When it comes to shooting portraits certain lenses, more specifically, certain focal lengths are better than others.

If you don’t want to read the rest of the post, with all the ‘splainin’, here’s the short version: For the most flattering headshots, shoot with a focal length somewhere between 85-100mm. That’s it.

For the longer version, here we go… **big stretch**deep breath**and, go…

When it comes to portraiture, which focal length to choose depends on the type of shot you’ll be taking. If you plan on taking a tight, head-and-shoulders shot you will get the most pleasing results shooting somewhere in the 85-100mm range. Why is this? Can’t we get the same tight shot with a 50mm by just moving in closer? Well, yes and no. With a wider lens, you can move physically closer to your subject and achieve a similar composition. However, shooting in this manner will distort your subject’s face. The closer you get to your subject, the closer they are to the curvature of the front element of the lens. This will cause the subject’s nose/face to bulge, looking unnatural. Shooting between 85-100mm, we get the same tight composition, but we are further away from the subject. More importantly, the subject is far away from the curvature of the front element of the lens. This keeps the subject’s nose /face from bulging, and therefore looking natural.

What about shooting with a focal length longer than 100mm? Can’t we use a 300mm and just move back? Again, yes and no. Shooting with a lens longer than 100mm you begin to have the opposite effect. The more we zoom in on something the more it compresses the image. So, the further past 100mm you get, the more compressed your subject’s nose/face becomes, looking flatter than it should.

To put it another way, shooting with a focal length between 85mm and 100mm eliminates the unflattering facial distortion wide-angle lenses are notorious for, while avoiding the compression long telephoto lenses give.

So which is it? 85mm or 100mm? There’s a massive debate over that one. In my opinion, it doesn’t really matter. In my honest opinion, anywhere between 85mm and 100mm is pleasing for close-up portraits. What about using a prime lens or a zoom? The nice thing about zooms that incorporate the 85-100mm range is the flexibility to pick 85mm, 100mm or anywhere in between. Plus, you don’t have to move your tripod or model each time you recompose the shot. On the other hand, Prime lenses tend to be sharper than zooms, but you loose the flexibility. So, pick your poison.

Most entry-level SLRs come with an 18-55mm lens. If this is all you can afford, then simply stay away from tight headshots to keep from distorting your subjects. If, however, you need to shoot tight headshots (to fulfill your vision), and you can afford it (without going into debt), then consider another lens. The complimentary lens you can pick up for a modest investment is the 55-200mm for Nikon, and the 55-250mm for Canon. These are relatively inexpensive and incorporate the 85-100mm focal length.

Again, this is all applies to tight, head-and-shoulder shots. Anything other type of portrait (3/4 length, full length, wide environmental, etc), you can use just about any focal length you want. For all of you out there confused about focal lengths, I hope things are a bit more clear.

Now, go out and shoot something!
March 22, 2010

April C's Image Critique (#2)


Friday, Jenny and I went out to eat, then hit the IMAX to watch Alice in Wonderland in 3D. It was brilliant. The day was beautifully sunny, reaching a delightful 70 degrees. But then it was over and Saturday came. We woke up to 8 inches of snow, and hit a frosty high of 32 degrees. How’s that for the first day of Spring? Gotta’ love Oklahoma weather. But I digress…

This week we have another image from April C. She’s the first to have a second image critiqued. I’m honored that several of you have sent in multiple images for me to scrutinize. From all the feedback, its been a worthy and beneficial exercise. So as long as you keep sending in the images, I’ll keep giving them my two cents.

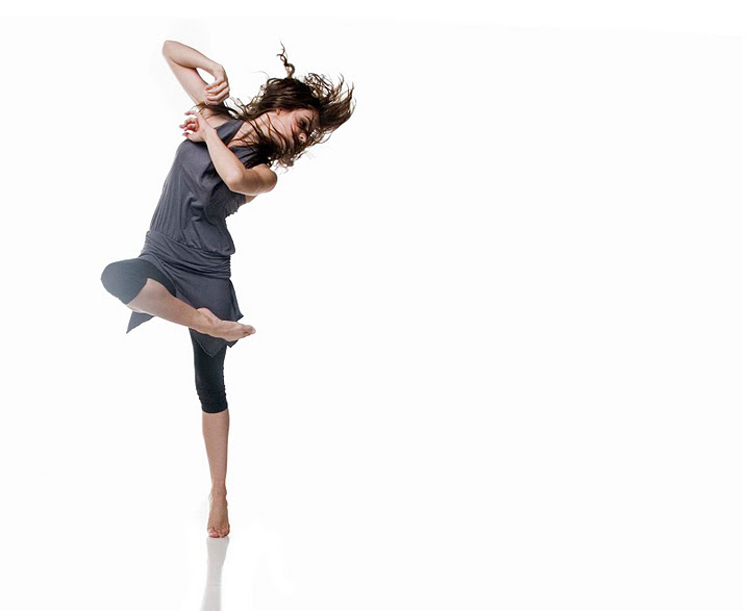
April’s image this week is of a girl dancing, captured on a pure white background. I’d like to start with covering what’s great about the image. First of all, I love the posing of the subject. There’s a ton of movement, showing a good amount of motion. This is perfect for a dancer. I really like the movement of the hair. Its crazy, all over the place, but you can still see much of the subject’s face. I also really like the posing of the subject’s body. Every joint is bent, which adds so much interest to the subject. Overall, the posing is excellent.

Another thing I like is the composition. I am a huge fan of dead space. Maybe its because I tend to have an editorial style to my own work. At any rate, it’s a great use of the extra dead space to the right of the subject. Its perfect for any use – it’d look great framed on the wall; and it’d be great for a magazine spread. It’s very multi-usable (is that a word?).

Now, on to the negative. First of all, the white background isn’t actually pure white. I'm sure its hard to see here on the blog, but there are areas that have a light grey hue. There’s a grey outline around the subject, and a grey line running across the top of the image. This is an easy fix in photoshop. All we have to do is use the dodge tool and clean it up a bit. If you’ve been following the blog for a while, you know how much I preach capturing the image IN CAMERA and not relying on photoshop to fix things. Well, this is one area I think photoshop is essential in creating the image. If you’ve ever shot a white seamless background, you know how hard it is to get it pure white. The lighting has to be perfect. You have to light your subject separately from your background. Then you have to light the background around 1.5 stops brighter than the subject exposure. And it has to be lit very evenly. This is usually done with at least three lights. To get everything perfect is very, very difficult. And even when you think everything is perfect, you open up the image in post only to find the BG is a tad grey. In this type of shooting, its almost a given you’ll be cleaning this stuff up in post. And it’ll take all of 30 seconds to do. So this is one of the few times you’ll here me say “this is an easy fix in photoshop.”

The only other thing that I find problematic is the light spilling over the subjects right leg. It looks as though a BG light is spilling back into the camera, just enough to wipe out the contrast on that leg. This is something that could have been fixed on set with better placement of a flag to block the light spill. But say you didn’t notice it while shooting (slow down), this too can be fixed in photoshop. Just burn it in a little and you’ll have your contrast back. But this just adds time at the computer fixing stuff, instead of using that time for creativity.

Overall though, you’ve captured a great image April! Thanks for sending it in. If anyone has anything to add, leave a comment.

Now, go out and shoot something!
March 19, 2010

Your Questions Answered: "What do you shoot with?"

© Todd Walker

I’ve gotten the question that every photographer asks every other photographer in the world: “What do you shoot with?” I really try hard not to make a big deal out of equipment. I don’t get into the Canon vs. Nikon, zooms vs. primes, blah blah blah. The reason is simple. I’ve seen images made with disposable 35mm film cameras that could run circles around some of the high-end pro cameras. To me the final image is the most important. When it comes right down to it, I couldn’t care less about what a person shoots with, so long as he or she is able to capture their vision. A good image is a good image. Period. The end. Game over. To read my opinion of essential gear, read this post HERE. At any rate, I’ve been asked the question so many times, I figure I’ll go ahead and answer the question. But I must warn you, you may be disappointed. My bag is far from glamorous.

What I use 99% of the time

Nikon D200 (you know, vintage)

Tamron 28-75 f/2.8

Nikon SB-800 (used for most of my portrait work)

(2) Pocket Wizard Plus II Transceivers (used to fire my flash)

(1) Light Stand

(1) Umbrella Adapter

(1) 45” Shoot-through Umbrella

Plus plenty of memory cards and batteries.

I also own, and use occasionally:

Nikon 18-200mm VR f/3.5-5.6 (used for a backup, and trips to the Zoo)

(3) Promaster 300ws studio strobes (inexpensive, but they get the job done)

(3) Light Stands

(2) 24x36” Softboxes

100ft extension cord

For most shoots, I can fit everything I need in a Tamrac 506, and carry a lightstand and umbrella. And that’s it. Is there gear out there I’d like to add to my bag? Sure. There’s some things out there that would help me fulfill my photographic vision. What would those things be? First and foremost, a new camera. Wait, what?!? What about all that “using your D200 till it dies talk in your essential gear post?” As I am beginning to shoot more and more weddings, I am finding I need a backup camera, for obvious reasons. Though my friends have been awesome about letting me borrow theirs for backups, having my own only makes sense.

Another thing I’d love to have is the ability to take my studio strobe on location, without the need to plug them in – ie, portable power. I’ve done amazing stuff with my SB-800, but to progress in my photographic vision, I’m needing more power. So I’m looking into that as well. I also wouldn’t mind having a wide angle prime lens, like the 20mm f/1.8 I borrowed from Nikki C. two weeks ago, and fell in love with. But for now, that’d be a luxury.

So for all you equipment geeks out there, there you go. But please, don’t go out and buy anything you see on my list thinking it will make you a better photographer. It won’t. The only thing that will make you a better photographer is you, not another piece of equipment.

Now, forget the equipment, and go out and shoot something!

March 17, 2010

Fighting Fire with Fire: a brief introduction to using light to control light

W. Eugene Smith was a legendary staff photographer for Life magazine. Concluding a lecture at Syracuse University he was asked “Mr. Smith, is the only good light available light?” “Yes,” he said and paused. A shudder ran through the crowd. That was it! No more flash! God’s light or nothing! But then he leaned back into the microphone, “By that, I mean any &*%%@$# light that’s available” (as told by Joe McNally in his book The Moment It Clicks).

Today I want to talk a little bit about how we can use light to control light. And I stress “a little bit.” Using flash is a massive subject, for which there is loads of information out there, and of which I am no expert. I have come a long way in my understanding of light and how to use it. But compared to Jeremy Cowart, Joe McNally, David Hobby, or Zack Arias, I'm just a hack with a light on a stick (but one day I’ll give them a run for their money =) ).

There are purists out there who will only shoot in available (ambient) sunlight. And I used to be one of them. Flash photography was sub-par, and to be avoided. But what did I know, I was young and ignorant. Looking back, this was not an informed decision. More than anything, I was scared of using flash, and thus, flash was bad. However, once I began to learn how we can use flash light to control available light, it opened up a whole new universe of creativity. With flash, we no longer have to avoid the harsh midday sun. Flash can control it, and we can shoot from sunup to sundown. With enough flash power, we have the ability to turn day into night (just check out this shot by Zack Arias). Once we learn how to use flash, we can become a true “Available Light” photographer, taking advantage of any light that’s available, including that hotshoe flash in our bag.

So lets get to the understandin’ part. In outdoor portraiture we have the ability to knock down the harsh sun simply by implementing a flash. Shutter Speed controls continuous light, while Aperture controls flash light. This is critical. Continuous light is controlled by Shutter Speed. Flash light is controlled by Aperture. Flash to Aperture, Continuous to Shutter. Tattoo that on your brain.

Here’s a down and dirty ‘splainin’ of how that works. Set up your flash to light your subject. Then expose for the flash by adjusting the aperture. With a hotshoe flash, you can usually get up to somewhere around f/11, depending on whether you use a modifier (i.e. softbox, umbrella etc.) or not. Then, expose for the continuous light by adjusting the shutter speed. You can darken the scene with a faster shutter speed, or lighten the scene with a slower shutter speed. Lets look at what I mean, with a real life example.

Here’s a shot of my good friend Aaron and his sister Amy. I shot both families together a few weeks back. The shoot had everything going against it. It was super windy, very cold, and in the harsh midday sun. Why didn’t we schedule it for later in the year when its warmer? Aaron and his family live north of Springfield, MO. Amy and her family live in Tulsa. Getting both families from different states available on the same day I was free for a shoot, was near impossible. We’d been trying to book a date for months. Finally a day in late January looked to be our only choice. Between the two families, there were five children under the age of 5, two of which were newborns. Starting at noon was the only nap-free time of the day. So noon it was. Here’s what the available light was allowing:

© Todd Walker ~ without flash

Shot at ISO100, f/6.3 at 1/250th. Harsh and nasty. Luckily though, I’m an available light photographer. I also used an SB-800 flash, because I had it available =). Knowing that adding flash can nock down a harsh sunlight, whipped it out, set it up, and started shooting. Here’s the result:

© Todd Walker ~ with flash

ISO100, f/11 at 1/250th. Much better balance. Not perfect, but a heck of a lot better than straight sunlight. Notice the smoother skin tone, the lighter shadows, and the deeper blue sky – all captured IN CAMERA. No photoshop needed here. And it saved countless hours and headaches trying to fix these problems later in post production.

Occasionally we will find ourselves shooting in a situation that is less than ideal. Having the knowledge and tools to adapt will allow us to capture our vision even in the poorest environment. The key to this technique is to properly balance the flash with the ambient light. If not properly balanced, the image can look unnatural. So be careful of that.

This post is only the tip of the iceberg, so to speak. A mere introduction to what is possible when we use every light that is available to us, including flash. Much of the time, the existing light works great for an image. But many times, what’s there simply won’t work. In these situations, having the know-how to control the environment with flash can allow us to create images otherwise not possible. For more information about this technique I highly recommend you check out David Hobby’s Strobist website, or Zack Arias’ Onelight Workshops and/or DVDs. Heck, even Popular Photography even has a post about it. As a creative, you owe it to yourself to at least explore what flash has to offer. It might just kick your photography to a new level.

Now, go out and shoot something!

March 15, 2010

Brad V's Image Critique


Good morning everyone. Time for another image critique. This week’s image comes to us from Brad V. Brad came across the blog while reading the discussion board on Jasmine Star’s facebook page. That’s one of the many places I stay plugged into in the greater photography community, giving back as much as I can. Brad told me he’s new to photography, and would appreciate any advice I (we) could give.

First off, I’d like to reiterate that I do not take these critiques lightly. I offer them for one purpose: to help others improve. I never mean to offend, but neither will I sugar-coat my thoughts. So, with that said, lets get to it.

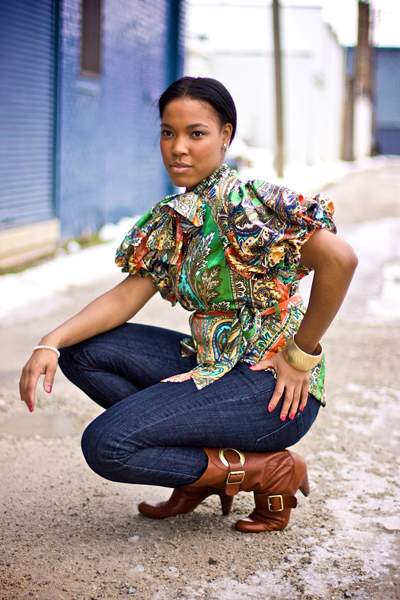
The image is a sort of a fashion shot of a woman in an alley. Overall, I think the image is pretty well done. It looks to be shot in available daylight, exposed well. Whenever we use available daylight, shooting in the open shade works well for portraiture. If we shoot in direct sunlight, the highlights can be too harsh and the shadows too dark. The open shade gives us that nice diffused light, resulting in a nice buttery skin tone. It was a great choice for this shot.

Next lets look at the composition. Overall the crouching position of the subject works well. If the image is intended as a portrait, one thing that would make it stronger would be to have the subject’s eyes looking at the camera. In portraiture, eyes are a person’s most important feature. They are the window to the soul. With the eyes looking to the camera, it would solidify a deeper connection with the viewer. It would draw the viewer into the image, and more than that, into the subject herself. The pose is pleasing, but eye contact would give greater impact to the image. On the other hand, if the aim is to showcase the outfit, a fashion shot, the eyes are much less important. In fact, by having the eyes looking away from the camera, the viewer is inclined to stay focused on the clothing, which is what you want in a fashion shot. The subject’s expression is fine overall, but depending on whether it’s a portrait or fashion, the eyes could be recomposed.

One thing that bugs me, just a little, is the subject’s left hand. This is a nit-picky thing to mention. But it seems a bit awkward. Perhaps moving the hand up to the waist, rotating the wrist so the thumb points towards her back, would look more natural. But again, this is a nit-pick. I only mention it to keep us continually thinking.

The next thing concerning the composition I’d like to discuss is the background. I like the alleyway. It’s a nice contrast to the beauty of the subject. But the placement of the subject needs to be adjusted. I’m can’t help but notice the dark line running through the subjects head. There’s a nice, dark blue building that abruptly stops and turns to bright white right behind the subject’s head. One thing we could do is move the camera around to the right, filling up the entire background with the dark blue building. This would give a consistent color behind the subject, which would be less distracting. Now, of course I have no idea what is to the left, if it would even be possible to do this. But assuming the blue building continues, this would be a much more pleasing background.

Lets say, however, something prohibited us from moving the camera, and this angle is all we have to work with. Another thing we could do is center our subject’s head between the blue building and the telephone pole. This would better frame our subject’s head. If there isn’t enough room, and I cringe as I type this, we may have to do a minor bit of photoshop to remove the pole. I cringe because we must strive to capture the perfect image in the camera. We should NEVER rely on photoshop to fix sloppy photography. Slow down, think it through, take the shot. More times than not, we are able to fix any problems we have, before we shoot it. If we commit to being disciplined in this manner, we are then able to use photoshop for creativity, not for fixing poor photography. (okay, stepping down from the soap box now…) If, as a last resort, we have to remove the telephone pole in post production, at least there wouldn’t be anything intersecting her head – always a plus =).

All in all Brad, you’ve succeeded in creating a nice image. If you are new to the craft, you have a good eye on which to build. Keep up the great work and check in from time to time to let us know how things are going!

Now, go out and shoot something!
March 13, 2010

First Friday Photos (on the 2nd Saturday)

So its finally First Friday Photos!! Though, its actually the second Saturday. Its been crazy around here for me, a roller coaster of sorts. Along with everything else, I've got a confession to make. You know the term "starving artist"? I find myself identifying with that label more time than not. You see, I'm in the beginning of this career called Photography. I don't have it all together. I'm not rolling in dough. I have to hustle for every dollar I can get, just to make ends meet. And that's fine with me. And more importantly, its okay with my beautiful and loving wife. She is more than supportive. As for my confession. Well, I don't have internet connection at home. That's right, I'm in the dark ages. Why? Simply put, times are tough. So how do I do all of this internetting, with the blog posts, online client proofing, website maintaining, and online socializing? Fortunately we live in an age where there are free WiFi hotspots everywhere. I do my work at home, then head to the Library or McDonalds for blogificating or internetting. I told my wife just the other day "one of these days, we'll be past all this. We'll look back and say 'remember having to go to Panera for WiFi?'" A dear friend and mentor always says "you do what you have to do, so you can do what you want to do." This is so true. By opting out of WiFi at home, I'm freeing up that money for other things, like food on the table. Its the same reason I'm operating CS2, drive a paid off '94 vehicle, and don't have an iphone. Some things in life are mere luxuries that we don't need. Fun? Yes. Like to have them? Yes. Necessary for my life? No. Is this difficult and frustrating? At times, you better believe it is. But for us, for now, it makes sense.

Why am I telling you this? I want you to know, if you are in the same boat, struggling with some of the small things pertaining to our craft, you are not alone. I'm there with you. But my passion for what we do is too great for me to travel easy street. I'll never put down my camera. And I refuse to go into debt for the craft. I am willing to travel a hard road for a time. For how long? I'm not sure. But I am determined to make it. I will pursue this until I make it, and then keep pursuing it. I have no choice. This is what makes me alive.

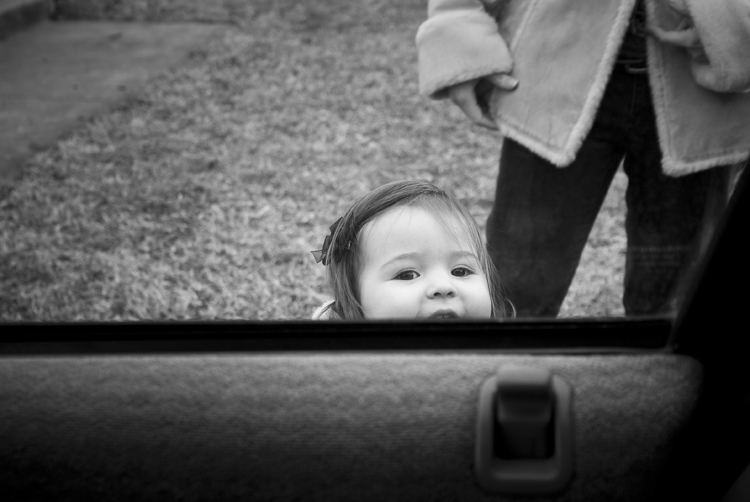
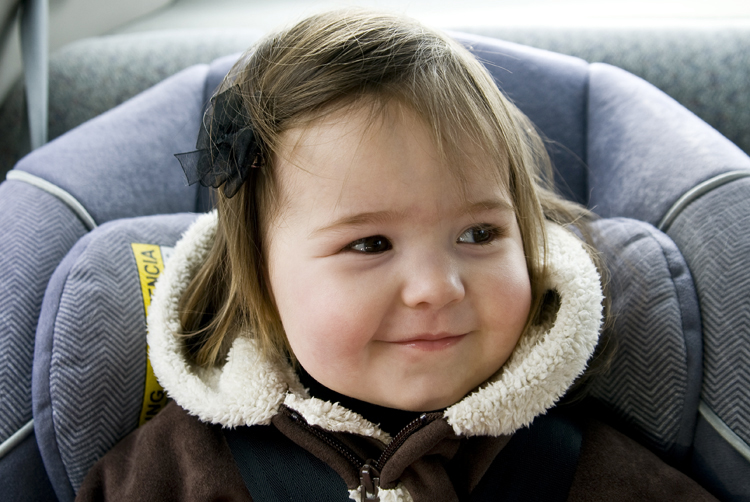
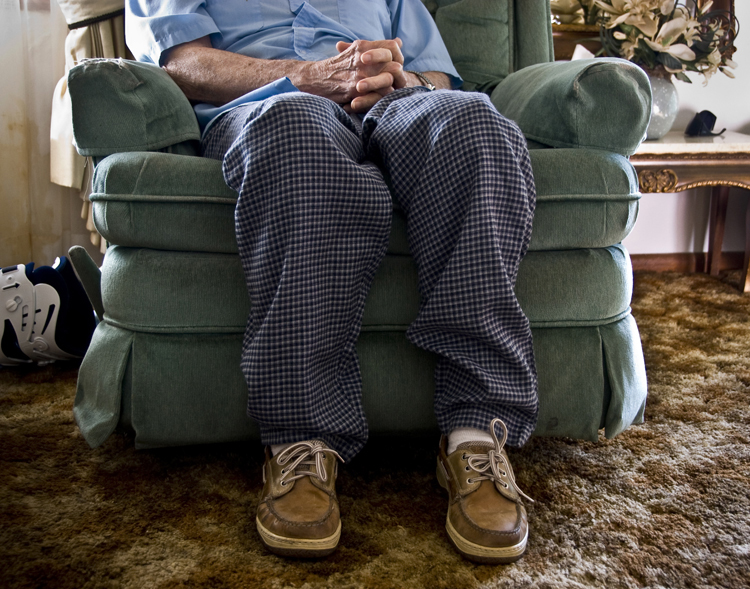
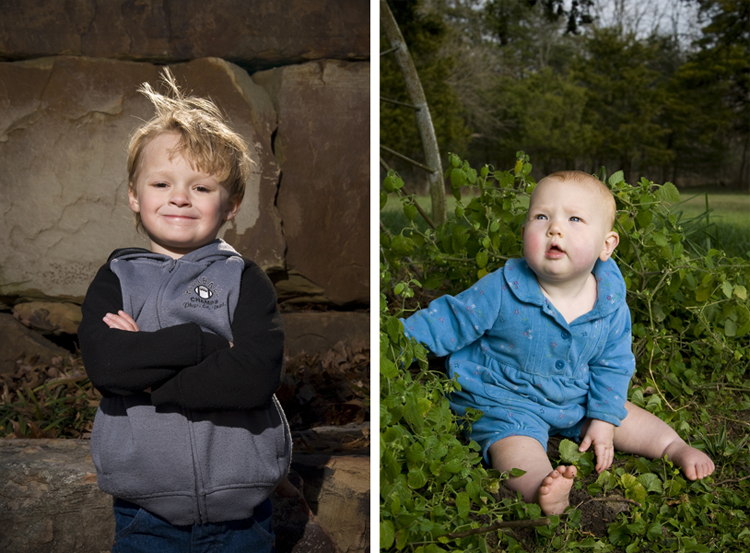
Now on to my images. I've only a few - last month was slow. Some are of my daughter. And a couple of them are from even further back but never shared. Let me know what you think. Feel free to critique any or all of them. I welcome your thoughts on my work. Like many of you, I need the input of others to improve. You know, iron sharpens iron, no one is an island, and all that. Have a great weekend everyone!


Now, go out and shoot something!
March 10, 2010

Memory Cards: Speed & Class 'splained

© Todd Walker

So you have a camera. It takes a memory card. So which one should you choose? What’s with all this class and MB/s mumbo jumbo? There’s a ton of confusion out there on the subject. Today we’ll look at memory card performance and how it helps us get the most out of our SLRs. An important thing to note is SD cards are the only ones to include both speed and class on the face of the card. Compact Flash and Memory Stick cards only refer to speed, and not class.

SD memory card performance is measured in one of two ways: speed, known as megabytes per second (MB/s), and class (C2, C4, C6, etc.). Understanding the difference of these measurements is often misunderstood, but essential in selecting the card that will best suit your needs.

Speed refers to continuously shooting still images in the burst mode. The speed rating (i.e., 30MB/s) designates the maximum sequential speed that data can be written to the memory card and transferred to a host device. This is also known as “read/write speed.” Lets say you have a card that has a speed of 30MB/s. This means the card will read/write up to but no faster than 30MB/s. The faster the card, the less lag time between frames during continuously shooting in burst mode on cameras that shoot at high frame rates. What’s a high frame rate? Usually a camera that shoots 5 frames per second or higher is considered a high frame rate.

Class refers to recording video. The class rating (i.e., C2, C4, etc.) designates the minimum sustained speed required for recording a constant rate of video onto the card. A card’s class rating corresponds to the minimum guaranteed data transfer rate megabytes per second. This means the card will record video no slower than xMB/s. For example, Class 4 cards are designed for a minimum sustained transfer rate of 4MB/s, while Class 10 cards are designed for a minimum sustained transfer rate of 10MB/s.

Cameras have the ability to record images in bursts up to 10 frames per second. This floods the card with a massive amount of data in an instance. These cameras demand high-performance memory cards with fast maximum write speeds. Current SLRs can produce huge files in either RAW, JPEG, or both. And RAW files can reach upwards of 20mbs. The larger the stream of data being crammed onto a card, the faster the write speed must be in order to handle the load. If a card is too slow, then shooting will pause until the card catches up to the camera, at which point shooting will resume. This lag causes missed shots, which isn’t good. But if a card is fast enough, the camera can shoot non-stop at its fastest frame rate until the card is full. So for fast shooting, a fast card is needed.

If you want to capture high megapixel still images at a fast frame rate? Then you need a card with a maximum write speed fast enough to meet your shooting requirements. Have an entry level SLR (which only shoots around 3-4 frames per second)? Then skip the high-speed cards. But if you have a more advanced camera and intend to shoot faster burst rates (say 5 frames per second and faster), in RAW format, then you will need a fast memory card. Rather than simply choosing the highest performing card in the store, you have to determine what type of shooting you’ll be doing. Then we can select the card that meets your shooting requirements.

Like it or not, we are merging photography and video. Today, most SLRs have the ability to shoot high frame rates and record HD video. And if we are going to be utilizing both, we’ll need memory cards that accommodate both mediums. If the card offers fast maximum write speeds but only a Class 2 rating, then it won’t be fast enough to record in HD. Also, if the card has a Class 6 rating but a slow write speed, then it will suffer a lot of lag when shooting in burst mode.

Again, this only applies to SD cards. If you’re shooting higher end SLRs, you only use Compact Flash cards. Then you only have to worry about speed. If you’re shooting sports, then you need fast cards. If you’re shooting portraits, then maybe not. And what about which brand to choose? Well, I use Promaster brand memory cards. The reason I choose them is twofold. 1) they have a lifetime warranty. If one ever fails, it gets replaced. In 3 years of hardcore shooting, I’ve only had one fry on me. Pretty good in my book. 2) I get a decent price on them at he pro camera shop I work part time at. I know, not nearly as romantic. But it’s a valid reason nonetheless. And to be fair, even if I didn’t work there and get the discount, I’d still choose them because they’ve been so reliable.

So there you go. Class and Speed ‘splained. Hope it helps. Happy shooting everyone

Now, go out and shoot something!
March 8, 2010

Nikki C's Image Critique

© Nicole Castic

First off, I want to say thank you for all the heartfelt well-wishes for my family concerning the death of my Uncle. It has been a very rough week. But, sad as we are, we are doing well.

Secondly, I missed my “First Friday Photos” last week because of everything going on. I’ll be posting them this coming Friday instead.

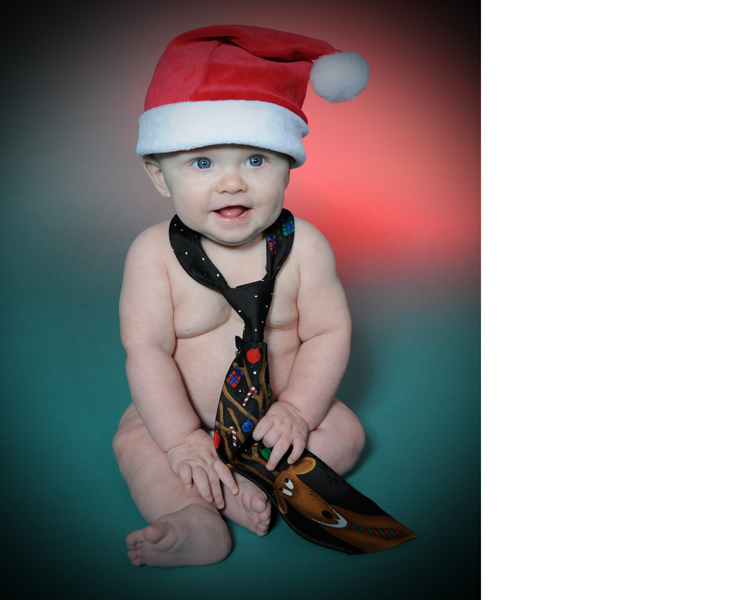
Now, on to this week’s image critique. The image comes to us from Nikki C. She’s submitted a picture of a baby wearing a Santa hat and a reindeer necktie. So lets get into it…

Lets first look at the lighting. The lighting is okay. Its well executed, but nothing to tell your friends about. It looks to be around a 1:3 ratio, suitable for this type of image – very safe. I do have a bit of the issue with the vignette though. Now, I am a huge fan of vignettes, using them on a majority of my images. But it has to be done well to work. A vignette is supposed to focus the eye towards the center of the image. But when it begins to overlap the subject, it simply doesn’t look right. The problem I have here is it bleeds too much into the subject. Notice the white ball of the hat and the baby’s foremost foot. They’re grey, looking unlit. And that bugs me. The band on the hat is nice and white, but the ball is muddy grey. Same thing about the skin. Most of it looks good, but that one foot looks like it has circulation problems (and if that’s the case, um… yeah, sorry ‘bout that). This image simply doesn’t need the vignette.

Next lets look at the green/red background. I get it. It’s a Christmas thing. But, ugh, really? To me this is in the same boat as selective coloring. The only time we should see this kind of stuff is many years in the future, when we open a time capsule from the 1990’s. Just sayin’. The thing is, good lighting on a cute kid is enough. We don’t need the nifty green and red to make it more than it is. He’s already wearing a cute Santa hat and reindeer necktie. What more do we need to say “this is my Christmas portrait?” Leave off the vignette, use a pure white background, and it would be a much stronger image.

The last thing I’d like to discuss is the baby’s pose/expression. Photographing babies and young children can be a very difficult. I’ve spent nearly 20 months shooting literally thousands upon thousands of images, trying to become better at photographing children - not coincidentally my daughter is almost 20 months old =). Capturing that perfect expression is hard to do. So anytime we get a good expression its a victory. In this image, the baby’s upright and alert, and the expression is pleasant. It may not be the perfect expression, but it’s a victory nonetheless.

The last thing I want to mention about this image is, well, I’ve seen it before. If you were going for cookie-cutter lower-end portraiture, then this image nails it. But if you want to truly excel at children portraiture, you need to figure out how to get to the next level. Why has Anne Gedes been able to build a multi-million dollar business? Simple - what she creates is not run of the mill baby pictures. She broke the mold, pushed the envelope, (insert cliché here). Nothing she creates is cookie cutter. I enjoy her work because its different, intriguing, enjoyable. Should we aspire to photograph babies like her? Not at all. Quite the contrary. If you are into photographing children, do so in your own unique way. But you must push past mediocre. Force yourself to become better. Strive to try new things. Break away from the status quo. Do something different. That’s what Anne Gedes did at some point. She decided to try something new, and now she’s selling books of her work with Celen Dion Cds inside. How could that not be a money maker?

Well, there you go. Yet another pair of my pennies. Thank you Nikki for sharing your work with us! Anyone else have anything constructive to say? Post a Comment below.

Now, go out and shoot something!
March 3, 2010

Good By Uncle Mike, We Love You...


We said goodbye to Uncle Mike on Monday. He was 57 years old. Mike was a good man, loving husband, and wonderful father. He put a smile on everyone's face, loving life and living it to the fullest. We loved him deeply and will miss him very, very much. Here's to you Uncle Mike, you deserve the streets of gold on which you're now walking.