The other day I was talking with a couple of photog friends of mine. One of them said, “hey, you should explain lighting ratios on your blog.” As we dove into the topic, I quickly realized how far removed I have become from text book, school-learnin’ photography. One of them is currently in photo school, and the other is fresh out of photo school. Topics like lighting ratios are fresh in their minds. Not so much in mine. They sort of ate my lunch on the topic.
Understanding lighting ratios can be very useful. They tell us how deep the shadows will be in a photograph. Different ratios communicate differently. Its a tough subject to both explain and to grasp. But I thought its a great topic for a post. So, I whipped out the ‘ol light meter, oiled the cogs in my brain, and went to work. You may have to read this post a couple of times to get it. But I’ll do my best to ‘slpain it to you.
For this post, I’m assuming you already understand f-stops and exposure, and how to use a light meter. I won’t go into all of that. But if you have any questions, feel free to leave a question in the comment section of this post, and you are always welcome to email me at todd@toddwalkerphotography.com.
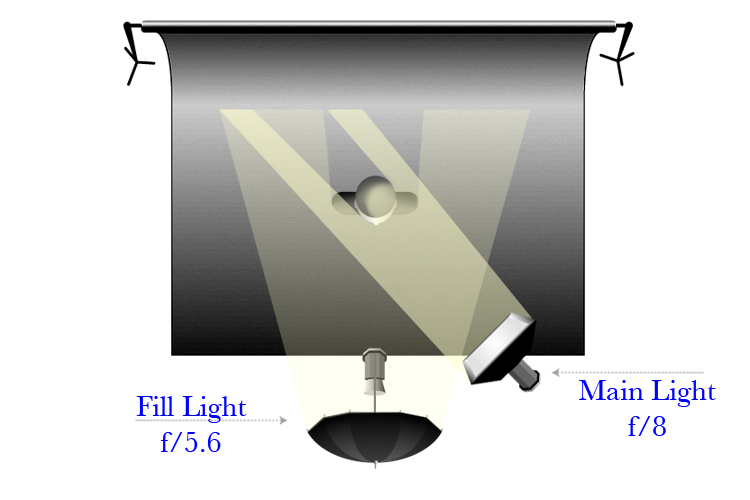
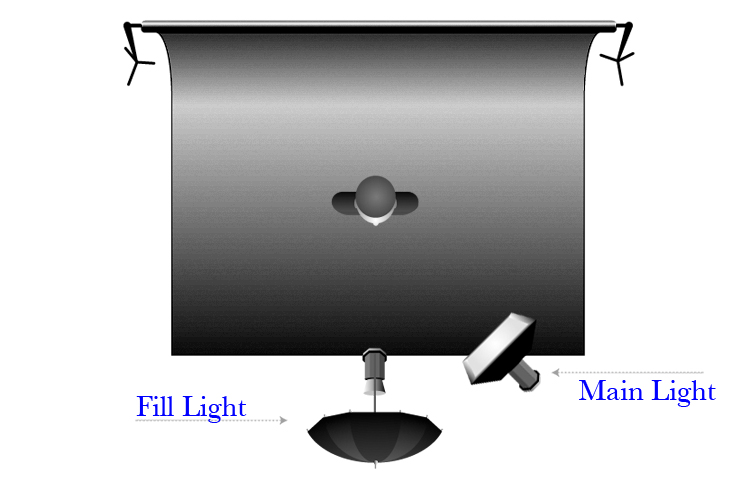
To explain how to calculate lighting ratios, we’ll be using a basic two-light portrait set up – main light positioned camera right and fill light positioned behind the camera. It looks like this:
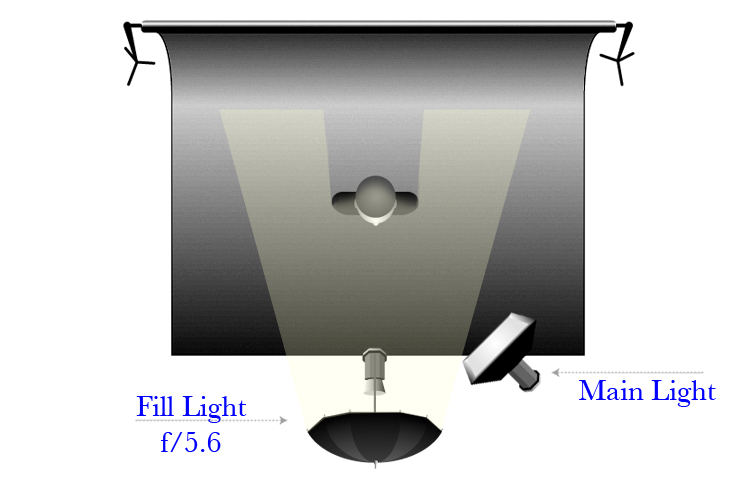
Let’s start by setting the Fill Light to f/5.6. By itself it would look like this: This will give a reading of f/5.6 across the subject’s face. This would be a 1:1 ratio – both sides of the face will have the same amount of light. If we shot a picture with this one light, we’d set our camera’s aperture to f/5.6, take the shot and be done. Our lighting would be okay, but fairly flat since its coming directly from the camera. But we want more a more interesting image. We need to add some dimension to the subject. For that, we’re going to add a brighter light to the right, which will better shape the subject’s face. Soooo… Let’s set the main light to f/8, which is one stop brighter than the fill. Using both lights together would look like this:
It is paramount to understand that each time the amount of light doubles, we’ve gained one stop of light. In other words, light increased by one stop is twice as bright. Two stops would be 4x brighter; three stops would be 8x brighter; four stops would be 16x brighter, and so on. This is key to understanding how to calculate lighting ratios. Our main light is coming from the right side, and not hitting the left side of the face. This ratio would read _:2 (2x brighter than the fill). The right side of the subject’s face already has light hitting it at f/5.6 from the fill light. And since our fill light has a ratio of 1:1, adding a second light that is twice as bright would give us a 1:3 ratio. Got that? 1+0=1 and 1+2=3, thus a 1:3 ratio. Feel free to go over that again =). There’s a lot of misinformation out there on this subject. A lot of people call this a 1:2 ratio; thinking that since the main light is twice as bright, it simply gives us a 2 on the right side of the ratio. The confusion comes from not accounting for what the fill light will contribute to the right side of the subject. One way to get a 1:2 ratio would be to move the fill light to the left of the camera, so none of its light would hit the right side of the subject. Then, since no light would be contributing to the right side, it would be a simple 1:2 ratio. Another way to get a 1:2 ratio would be to leave the lights where they are, but set the main light to f/5.6, same as the fill. This would increase the amount of light on the right side by one stop (twice as bright). Then it would be a 1:2 ratio. Make sense? Feel free to read that paragraph through a few times as well =).
Back to our 1:3 ratio. . .
Now that we have our lights set up, lets set our camera. In this scenario we would set our aperture for the main light side of the face. Remember, we have to account for BOTH the main light AND the fill light. So, f/8 plus f/5.6 would give us a reading of f/9.5. Say what? Why not set our camera to f/11? Remember, a one stop increase is twice as bright. The main light is f/8. Then we are adding half as much light (f/5.6) to that, thus we get f/9.5. That’s half a stop between f/8 and f/11. Only if both lights were set at f/8 would the brightness be doubled and equal f/11. Since we are adding f/5.6 to f/8, we get f/9.5. So we set our camera to f/9.5. Yes, you can go over that paragraph a few more times as well. Equal sign right parenthesis.
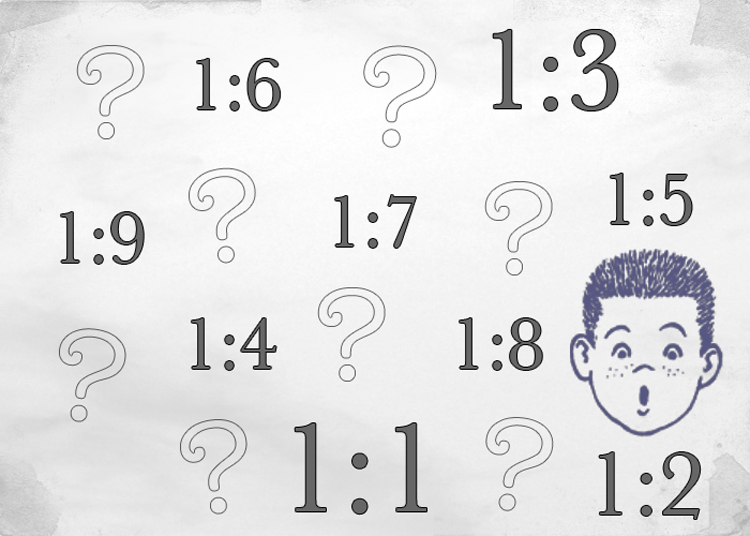
Out on the street, I have developed a tried and true way for getting the proper ratio. I set up the first light and adjust it to the desired f-stop I want to shoot. Then, if the shadows are too dark, I might simply use a reflector to bounce light back into the shadow side of the subject. If that doesn’t do it, I’ll add a second light and adjust it until the shadows are at a level I want. That’s it. I very rarely even think about lighting ratios. I use the LCD and my E-Y-E. The only time I think about them is for cookie-cutter shots (proms, school photos, church directories, etc.). I remember from my schoolin’ days that a 1:1 ratio is flat. 1:3 is safe, suitable for cookie-cutter shots. A 1:5 ratio means drama. And 1:9 is the edge of darkness. For those jobs that require safe, traditional lighting, out comes the ol’ light meter. I set my lights one stop apart. Then bang away on the shutter button.
For example, I recently had a church directory shoot. I threw up a muslin background and a bsic two-light setup, like the one we've been using here. I set my main light to f/8. Then I set my fill light to f/5.6. Thats one stop difference, a 1:3 ratio. I set my aperture to f/9.5 and started to shoot. Setting up took me all of 15 minutes. (would've been 5 minutes had my softbox been more agreeable). Here's a look at the setup ::
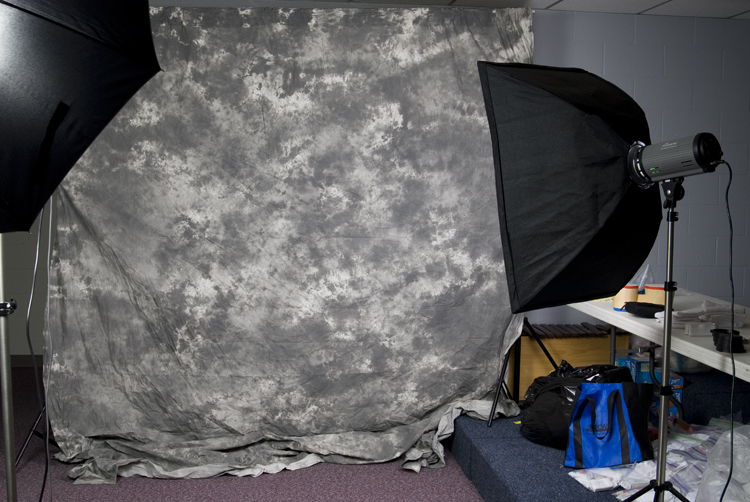
(The room was so tight, I had to move the fill light over to the left so I could back up enough to take this shot. But I did move it back up and behind the camera).
And here's the boring, but safe and suitable result:
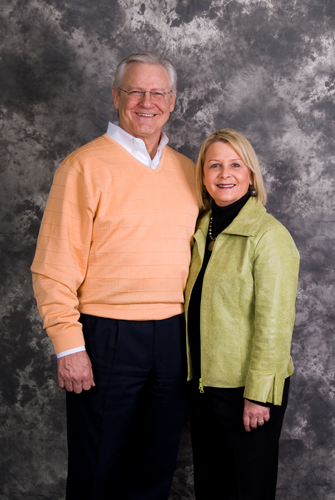
Is this the most amazing photo you’ve ever seen? Of course not. I don’t know any photographer who aspires to making church directory images. But they help pay the bills. As artists, we do everything we can to pay the bills. Even the less exciting, less creative assignments. We do what we HAVE to do, so we can do what we WANT to do.
So there you go. Everything you will ever need to know about lighting ratios. Okay, well, maybe not. But it’s a start. It all may seem like an overload. But it isn’t exactly rocket surgery we’re talking about here. And it sure as heck isn’t brain science. It may be difficult to understand, but we aren’t trying to cure heart disease. At the end of the day, we’re just taking pictures. If you’re new to this lighting stuff, don’t be afraid of it. Its just light. It won’t bite. And light that won’t bite is just right =P. We have an incredible amount of creative control when we control our lighting. Understanding lighting ratios is a good thing. But if all this stuff flies over your head, don’t worry. Your camera won’t blow up. Lighting ratios can be a useful tool, but being constrained by them will kill our creativity.
As I said earlier, if you have any questions about this, or anything photography related, please post them in the comment section below. Or feel free to e-mail me at: todd@toddwalkerphotography.com
Now, go out and shoot something!

No comments:
Post a Comment